Wednesday, February 18, 2015

Cajun Sausage & Peppers with Spaghetti Squash


Today is Day 3 of no school/work thanks to the ice storm that blew through the Upstate of South Carolina on Monday. We're expecting record lows for our area tonight and tomorrow night (SINGLE DIGITS with wind chills BELOW ZERO!!)  As a result, that means I have time to photograph my meals and blog! YAY! So, yesterday was "Fat Tuesday", aka: Mardi Gras. I've only been to "Nawlins" once for a speech therapy convention, but what a fun experience it was! My first meal I had there was the most amazing Shrimp Po' Boy from a little hole in the wall restaurant that I'd have no idea where to tell you it was located (maybe near my hotel??). Po' Boys are New Orleans classics and for the past few years, that's been my Fat Tuesday ritual. I decided to do something a little bit healthier this year though. My Mom sent me a recipe that she found on Facebook for this amazing looking cajun shrimp and sausage pasta dish. I changed it up a bit, but mostly stuck to the recipe and it turned out pretty fantastic! And it's really pretty simple to make too! Doesn't take too long to dice the onions, peppers, and sausage and it's a one pot recipe to top it off! The recipe calls for making your own "Essence" seasoning (I'm assuming this is taken from Emeril's Essence seasoning that you can buy in the store). However, I just decided to buy my own Cajun seasoning...and seeing how Emeril's Essence cost nearly 5 bucks, I went for the Webber's version that was only a little over 2 bucks and it turned out to have a lot of flavor and heat! Instead of using pasta, I also substituted spaghetti squash, and it didn't leave me missing the extra carbs from the pasta at all. What's this "spaghetti squash" thing, you may ask? Oh my friend, let me introduce you to a wonderful healthy alternative! It looks like a butternut squash, but when you cook it, you can shred it with a fork and out comes strands of squash that resemble spaghetti! "Girl, I know what spaghetti squash is...I use it all the time" you may also say. BUT, did you know you can just cook it in the microwave?!  ("Say WHAT?!"). Oh yes! That's the ONLY way I ever cook it! Baking it in the oven for 45 minutes is just not something I ever have time to do, and why bother when you can pop it in the microwave for 12ish minutes instead??

Here's how to cook spaghetti squash in the microwave:
  •  Pop the whole squash into the microwave for 3-4 minutes (this will "tenderize" it so you can better cut it)
  • Remove from microwave and very carefully use a large knife to cut squash in half, lengthwise (this isn't the easiest part, even though you've tenderized it already...BE CAREFUL!)
  • Use a spoon to "de-gut" the seeds and membrane in the middle (much like a pumpkin)
  • Put the cut squash in a microwave safe baking dish cut side up or down ("they" say to put it down, but I've done both ways and it really doesn't matter), and add about 1/2 inch of water to the bottom. Cook on high for 8-12 minutes (cooking time will depend on the size of the squash selected.) See picture below (though, it should be noted, my microwave isn't big enough to hold a baking dish large enough for both halves, so I have to cook mine in 2 batches).


  • Remove dish from microwave and remove squash from dish (will be hot! use pot holders!)
  • Take a fork and scrape vertically all along the squash to remove the strings of squash; spoon into a bowl and set aside (It should look like the picture below).


I hope that helps make using spaghetti squash as an alternative even easier for you!

Now, for the main course!


First of all, here are some of my "special ingredients" I use in the recipe: Better than Bouillon chicken base, the Weber N'Orleans Cajun seasoning, and jarred minced garlic. Y'all. If you don't use base or bottled garlic...why not?? If I'm just making a meal for myself or close friends, I always take the easy route with garlic and just use the kind in the jar. That way, my garlic isn't constantly going bad, and it's already minced for me. If I'm making a "special" meal (i.e.: my parents or a friend's birthday...you were thinking "date", right??  Ha! What's a "date"?!). Anyways! As I was saying...if I'm making a special meal, then I get the real stuff and pull out my garlic crusher, but otherwise I just use the jarred/bottled stuff.


 First, you'll saute the onions, peppers, and sausage in a pan (read the recipe below...you do this in stages). I used andouille chicken sausage, but have also used smoked turkey sausage as well. You can use regular smoked sausage if you prefer, but I prefer using chicken or turkey sausage (it's leaner...aka: "healthier").

 Next, add in 1/2 cup of stock. As you can see, I'm just adding in water. That's because I prefer to use chicken base. A jar of it will last you awhile and in the end, it's WAY cheaper than buying stock every time you need it and it's so much more flavorful and easy! I prefer "Better the Bouillon" brand.

 If using base, add it to the pan and stir. You'll use 1 teaspoon for every 8 oz/1 cup of stock called for, so for this recipe, add 1/2 teaspoon.

 Now, you'll add your spices and stir everything up and cook it for a few more minutes. Just so you know, the recipe calls for 1 Tablespoon of the Cajun seasoning and if you use the Weber brand it's going to make it speesy-spicy! I like a kick to my food, but if you don't, I'd recommend to start with just 1/2 Tablespoon and add more to taste at the end.


 Add 1/2 cup of half-and-half (or heavy cream), stir in and let cook a few more minutes until it starts to thicken up a bit.

Now you'll add 1/2 of the spaghetti squash to the pan (or if using a small spaghetti squash, add the whole thing). Stir it all together and let cook for a few more minutes.

Lastly, remove the pan from the heat, add grated Parmesan cheese to the mix (I also had mozzarella cheese on hand, so I added that too), and stir it all together. If yours is still really runny, let it sit for about 5 minutes, and it will thicken up as it sits.


 And that's it! Doesn't it look YUM?! (Well, it IS...so you should make it!)


I GAH-RAN-TEE (yes, you have to say that in the "Zatarans" N'awlins accent! C'mon...you KNOW that you know what I'm talking about!) your taste buds will be loving this!!  It's being added into my meal rotation...it's legit good.

 MMMM...MMMM....GOOD!

Enjoy!!


Cajun Sausage & Peppers with Spaghetti Squash
Yield: 4-6 servings 
Ingredients: 
  •  1 medium spaghetti squash, cooked and shredded (see recipe above for microwave directions)
  • 1 TBL olive oil
  • 1 TBL Cajun seasoning (if you're sensitive to spice, start with 1/2 TBL and add more to taste)
  • 2 andouille or smoked turkey or chiken link sausages, sliced and quartered
  • 1 medium diced green bell pepper
  • 1 small diced sweet onion (or 1/2 medium)
  • 1 TBL minced garlic
  • 1/2 cup chicken stock (or 1/2 cup water plus 1/2 teaspoon chicken base...what I prefer)
  • 1 tsp dried thyme
  • 1 tsp dried basil
  • 1 tsp kosher salt (more to taste)
  • 1/4 tsp ground black pepper (optional) 
  • 1/2 cup half-and-half
  • 1/2 cup grated Parmesan cheese     

Method:
Cook spaghetti squash (either in oven or microwave), shred strands with a fork, place in a bowl and set aside. Heat 1 TBL olive oil over medium-high heat in a large saute pan and saute the onions and bell peppers. Saute, stirring occasionally, until the onions are translucent, about 3 minutes. Add the sausage and cook another minute. Add the garlic to the pan and saute for 30 seconds. Add the chicken stock to the pan and scrape with a spoon to remove any browned bits that have formed in the bottom of the pan, about 30 
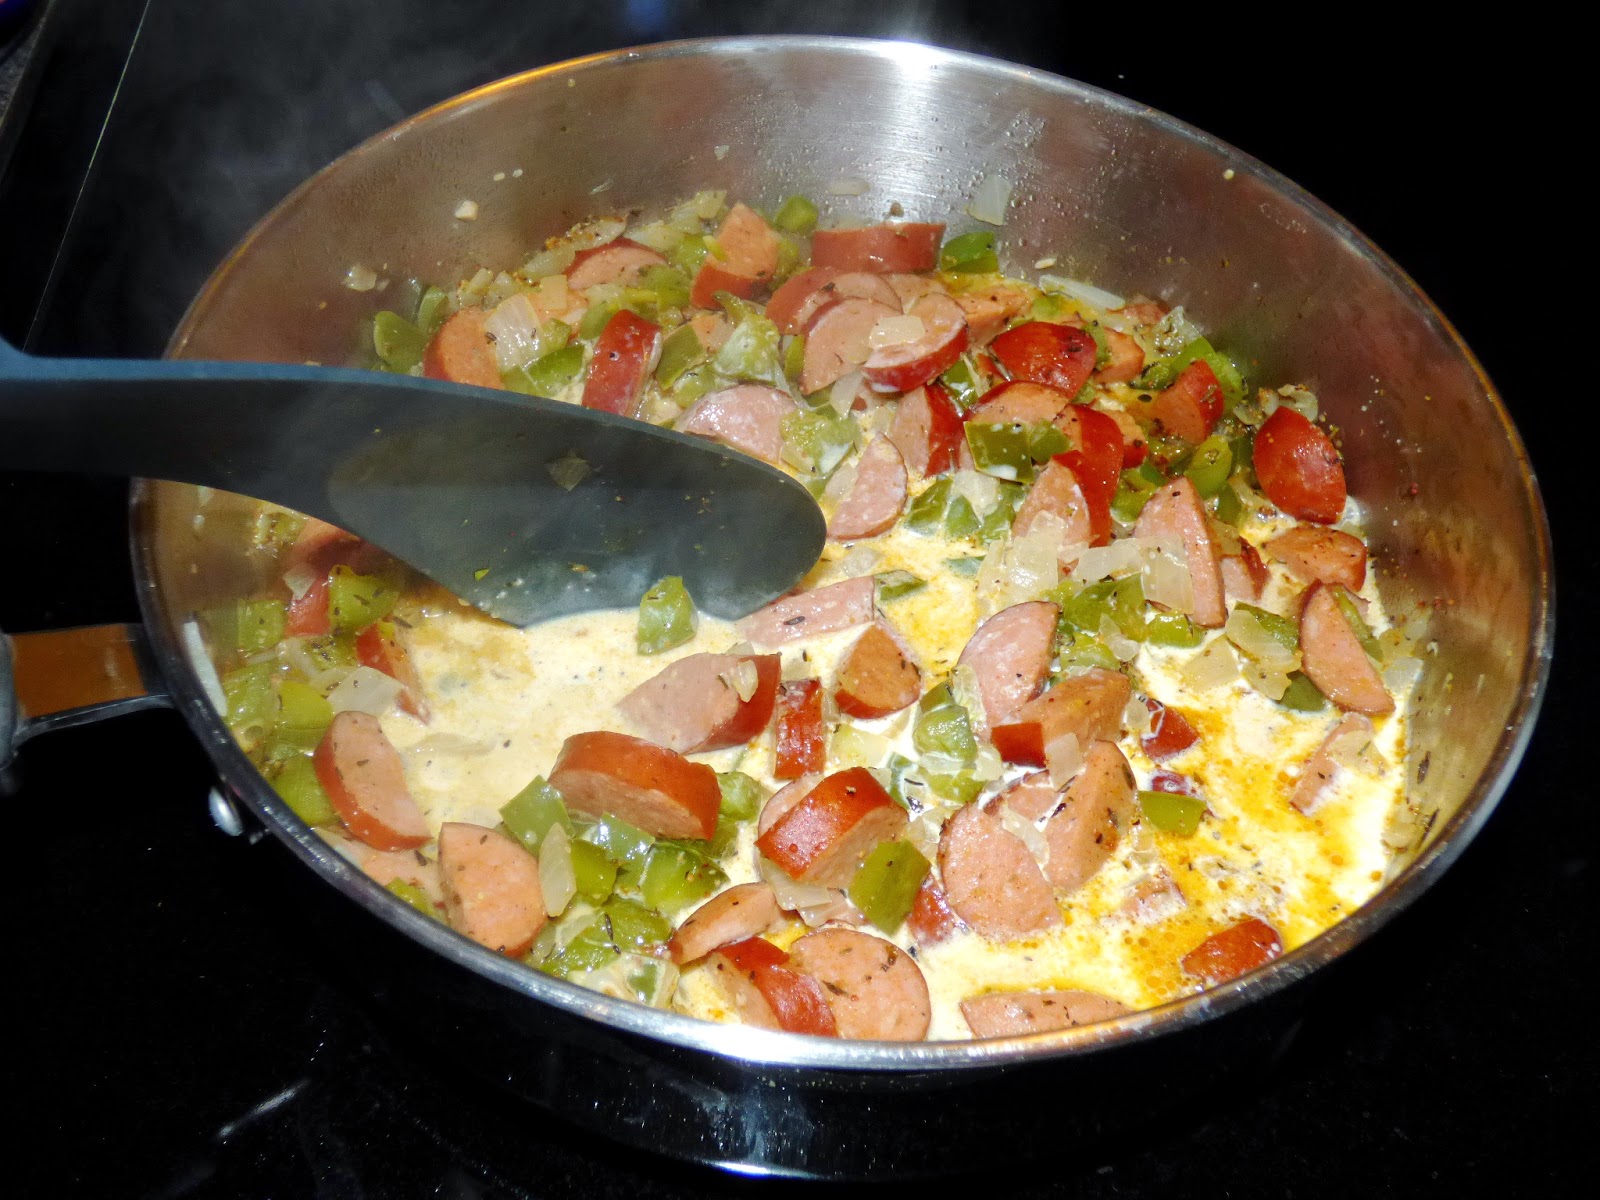
seconds. Add the thyme, basil, cajun seasoning, salt, and pepper (optional) and cook for 2 minutes. Add the half-and-half to the pan and cook an additional 2 minutes. Add the spaghetti squash to the pan. Continue to cook, stirring occasionally, for about 3-5 minutes. Remove from the heat and stir in the Parmesan. Top with additional grated Parmesan and cajun seasoning (if desired).

Saturday, January 10, 2015

Chicken & Broccoli Cheddar Cheese Soup


It's cold here in upstate South Carolina! I'm talking, wind chills in the single digits cold!  For the South, that's like negative temps for you Northern folks! When it gets cold outside I crave warm soup. And one of my favorite comfort soups is broccoli cheese soup. It's been my favorite for as long as I can remember. If there's the option to order it at a restaurant, I'm likely ordering it! I know it's probably not the healthiest soup, with all the cheese in it and butter and flour, but I've tried to lighten it up and make it as healthy as I can think! I use coconut milk and fat free half & half instead of whole milk, whole wheat flour, lots of broth/stock, and reduced fat cheese instead of full fat. I also add in some rotisserie chicken breast to get a dose of meat and extra protein in it. You're welcome to use your own boiled chicken breasts, but I like the ease of using the rotisserie...I only need part of the breast, it's already cooked for me, it's usually cheaper than buying just a pack of chicken breasts (at least at my local grocery store!), and I can use the rest of the chicken to eat off for other dinners or lunches! There's also a bit of hot sauce to give it a SLIGHT kick (but it's barely noticeable!). I take the easy route and just get the steamer bags of broccoli and microwave them half the recommended time on the bag. Why did I use 2 types of milk and so much broth? Well, the coconut milk can have a strong flavor, so to make sure the soup didn't taste like an Asian soup, I had to balance it out with a little bit of dairy and lots of stock. The result? A cheesy, delicious warm your toes soup (that I have to tell myself to NOT eat 10 bowls of!)

 Side note: My parents gave me one of their old camera's to use for my food photos. ("Old" as in my Mom has a habit of buying nice camera's, getting frustrated with not being able to figure out how to use it, and then buys another one and passes the "old" one on to my Dad to use for work! This one was only bought last year, so it's not "old" by any means! Thanks, Mom for getting frustrated with it! :) ) Hopefully I can figure out how to make the pictures look as good as all these awesome blog photos (mine NOT being included...). I need some practice with my food staging!  Either way, thanks to my awesome parents for your generous gift! (And I hope the lack of photo skills doesn't deter you from eating this soup!)

Enjoy!


Chicken & Broccoli Cheddar Cheese Soup
Serves: Approximately 6-8

3 TBL extra virgin olive oil
1 large sweet onion, chopped
4 TBL whole wheat flour
2 cups unsweetened coconut milk
1/2 cup fat free half & half
4 cups vegetable broth/stock (I like to use "Better than Bouillon" base)
2 cups low sodium chicken broth/stock (again, I prefer "Better than Bouillon" base)
24 oz frozen broccoli florets steam bags (cooked half of recommended cooking time in microwave)
2 cups rotisserie chicken breast, diced into bite size pieces (I just break it apart by hand)
5-6 cups reduced fat shredded cheddar cheese
1 tsp kosher salt (more to taste)
1 tsp ground black pepper (more to taste)
2 tsp garlic powder (more to taste)
1 tsp hot sauce (Frank's is good)

Heat the oil in a large pot or dutch oven. Add in the onion and saute for about 4 minutes, or until soft. Sprinkle the flour onto onions and cook 2-3 minutes, or until no more lumps appear. Add in the coconut milk, half & half, vegetable & chicken broth, salt, pepper, garlic powder, and hot sauce. Bring to a rapid boil, then reduce heat and allow to simmer over medium heat about 15 minutes. Add in broccoli and cook 10 minutes. Add chicken and cook 10 more minutes, or until broccoli is tender. Remove from heat and immediately add cheese, stirring until melted. Taste and add more salt, pepper, garlic powder, or hot sauce if needed.  May serve with optional french or sourdough bread or alone. Enjoy!

Bon Appetit,
 

Thursday, December 18, 2014

Scottish Shortbread


Shortbread. Just the name brings back happy memories of Christmas as a kid. THIS is the recipe that gives my blog it's namesake. My Dad used to make this at Christmas for as long as I can remember. We never had it any other time of the year (probably because it's SO unhealthy!), but it made Christmas that much more special knowing that we'd be getting this special treat. Although, I guess that was true to the history of Scottish shortbread, as it was originally a luxury only reserved for special occasions like Christmas, Hogmanay (Scottish New Year's...it's a 7 day celebration...it's amazing...don't you wish you were Scottish too?!), and weddings. If you've ever had shortbread cookies from the store.........this is NOTHING like them! It's SO. MUCH. BETTER. It's addictive...seriously. My Dad's Mom was born in Scotland, so it's legitimately a true Scottish recipe! Is it hard to make? Nope! Couldn't be simpler. What's in it? Ohhh, lots of unhealthy stuff! (Pre-diabetic Paula Deen would approve). Here's the recipe in a nutshell: combine 2 sticks of softened butter (yes, you read that right!), regular WHITE granulated sugar, and flour in a mixer. Put in pan. Cook in oven. Let cool. See how easy that is?? Honestly, I didn't even realize how easy it was until yesterday! I finally decided to attempt to make it and give it as Christmas gifts to my Speech department at work. That's when I was shocked how simple it was! But there's a method. When you put it in the pan (can be an 8x8 square or 9" round pan), you have to make a mound in the middle so that the sides rise evenly. And the middle is going to be a little bit more "mushy" than the outer edges initially, but it WILL harden as it cools. When it's done, it should be white-golden in color. It's pretty amazing when it's eaten still warm (as can be seen from the missing pieces in the picture!), but it's just as good after it's cool too.

This is what it will look like after mixed. You'll be able to just pick it up and mold it.


 And this is the finished product. It's SO. GOOD. And yes, I DID have to taste test those to make sure it turned out right! Clearly, my photography skills aren't advanced.


 When it's still warm (or even after it's cooled) cut it into squares, triangles, or rectangles.

This is also a great gift idea, and it's very inexpensive too. I found some decorative salad plates on sale at Target (less than $5!), already had some wire ribbon (bought it on sale for about $1.50 at Wal-Mart last year), and already had the gift tags (Hobby Lobby last year, about $2 or less on sale). Just fill up the plate with the shortbread, cover with some saran wrap, cut an extra long piece of ribbon and tie around to make a big, pretty bow- threading the gift tag into one of the strands of ribbon before making the final tie on the bow. Easy, inexpensive, pretty, and yummy!


Merry Christmas!

(Side note: I sure hope this wasn't a family secret, because I'm posting it without my Daddy's permission!)

Scottish Shortbread
1 cup butter (2 sticks) at room temperature (or soften slightly in microwave- don't melt it though!)
3/4 cup white granulated sugar
2 cups all purpose flour
1/4 tsp baking soda (optional- to make it fluffier)

Preheat oven to 350 degrees. Mix all ingredients in an electric stand mixer, adding flour 1 cup at a time. After mixed, place in ungreased 8x8 square pan (there's enough butter in the shortbread that you don't need to grease the pan!). Shape in pan so that the shortbread is slightly mounded in the middle and pick all over with a fork. Bake for 30 minutes, or until lightly golden. Middle should be slightly mushy still (will harden as it cools). Remove from oven and pick all over with fork again. Let cool on wire rack and cut into squares, triangles, or rectangles (fingers).

Bon Appetit-

Saturday, August 2, 2014

"Anything Quiche" (Crustless or with Crust)


I can't take any credit for this recipe, as it's my Daddy's creation and it's by far the best quiche I've ever eaten time and time again! (And I'll fight you on that if you try and say otherwise!...not really...).  Which, I actually didn't get his permission to post this to the world (sorry Dad!  Forgive me?)  I'm calling this the "Anything Quiche" because this recipe is really so versatile I don't want to limit it by saying exactly what kind of ingredients are in this.  You really can add ANYTHING to this!  Any combination of veggies, meat and/or cheese works for this.  The recipe is for a basic Quiche Lorraine (bacon, onion, and Swiss cheese), but you can substitute and add various other ingredients- don't let the recipe limit you on whatever you're craving (or have on hand!)  The pictures in this post are for a spinach, turkey bacon, onion, and Swiss/Monterey Jack cheese quiche.  My favorite combo of cheese is Swiss and Gruyere- they both balance each other out so well it makes for one killer quiche!  The recipe also calls for heavy cream, but I've used half and half before and though it's not as rich of a flavor, it does still work fine if that's what you prefer.  You can also make this recipe with OR without the crust.  I make it without crust (makes it low-carb and gluten free), but it's just as amazing with the crust too (and more true to an actual quiche...)!  Either way, just make sure you butter or spray the pie plate first.  I use my Misto with EVOO in it and it works great with no sticking.  


Use a 9" or 9.5" pie plate either way.  The deep dish crust will need at least that much space, and the crustless quiche fits perfectly in that size as well.  If using crust, you can pre-cook it first for a crisper crust, but it's actually not even necessary (my Dad never does when he makes it).  And yes, having brown on the sides of the crustless quiche is perfectly normal- you didn't burn it!

See?  Brown sides.  Perfectly normal!

  I LOVE to make this on the weekend and then eat off it for quick "on the go" breakfasts throughout the week.  Just pop it in the microwave, throw it in a tupperware, and it tastes just as good as it did hot out of the oven!  And it's VERY filling!  I can go hours and not get hungry again because there's so much protein in it from the eggs, cheese, bacon, and spinach.  The basic method to the quiche is this:  cook your meat and/or veggies first (unless you're using frozen spinach, then just let it thaw and then "squeeze" out all the extra water with your hand over the sink and again squeeze it with a paper towel), let them drain, mix together wet ingredients with seasonings, pour into the pie pan, add the veggies/meat/cheese, lightly blend with a spatula (or a spoon...I just think a spatula works better...that might be in my head though...), cook and eat! Easy!  If you're using fresh spinach or kale, make sure that you saute and drain it first (can do this along with the onions if using them), otherwise all the liquid will be released once it's cooking and the quiche will end up being too runny.  Runny quiche=sad quiche (because you probably won't get to eat it...and that's sad...tragic really).  Once again, I'd recommend buying a block of the cheese and shredding by hand, as it melts better fresh off the block, but if you don't want to do that, at least buy the Sargento brand of shredded bagged cheese- that's the only brand I've really found to melt anywhere similar to freshly shredded.   

Also, if you can, I highly stress investing in whole nutmeg!  


The freshly grated nutmeg tastes 10 times better than the pre-ground stuff.  And though it's a little pricier to buy initially, you will hang onto it FOR-EVER!  I think I've had my jar at least 2 years and I just used my second or third nutmeg (and I bake and cook A LOT).  The difference in the flavor it makes in baking is amazing.  Invest in it!  You'll need a grater for it too- I have a microplane.  You just grate it along the microplane, and in 2 seconds you've got fabulous tasting nutmeg- it's quick and easy and worth the investment!


Worried about what to add to your quiche??  Don't!  You can really make any combination with this.  Broccoli and cheddar, ham and cheese, mushroom/peppers/onions, asparagus and gruyere...anything! When I go home to visit, Saturday mornings are a lot of times filled with Daddy's "clean out the refrigerator" quiche- which means he goes through the fridge and finds whatever leftovers they had that week, or whatever is in the pantry, and throws them into the quiche and it always tastes fantastic!  There have been some interesting combinations at times, but it's always turned out delicious!  So, release your creative juices and make up your own combinations (or, if that intimidates you, just use what I've posted below!).

Now to just hope that I don't get in trouble for sharing my Daddy's "secret" recipes...oops!

Turkey bacon, spinach, and onion quiche with Swiss and Monterrey Jack cheese


 Yep.  Tastes as good as it looks!

"Anything Quiche" (with or without crust)
Serves: 4-8 servings (depending on how big you cut your slices!)

Ingredients:
4 eggs
1 cup heavy cream (or half-and-half)
1/4 tsp nutmeg (freshly grated is best)
2 cups Swiss cheese (or use 1 cup each of 2 different kinds)
1/2 onion, diced
3/4 tsp kosher salt
1/4 tsp ground black pepper
1 pound bacon, diced before cooking (or just use 4 slices if adding more than just bacon and onion)
1 deep dish pie crust (optional)- pastry dough or pie shell is fine
(I added one 10 oz package of frozen spinach, thawed and "squeezed" out to remove excess liquid)

*For any other combination, just substitute the bacon/onion for the other ingredients you add

Method:
Cook bacon and saute onion in a pan and set aside to drain on a paper towel lined plate. (If using fresh spinach/kale, saute and drain as well).  Preheat oven to 425 degrees.  Butter or use Misto EVOO to coat a 9-9.5" deep dish pie pan.  If using crust, add pie crust/dough to pan and either cook it first (for a crisper crust, but not necessary) or set it aside.  If NOT using crust, just spray/butter pan and set aside.  Wisk eggs, heavy cream (or half-and-half), nutmeg, salt, and pepper in a medium bowl.  Pour into the prepared deep dish pie pan.  Add bacon, onions, and cheese (and/or whatever other ingredients you're using) and lightly blend (I prefer using a spatula).  Place in the preheated oven for 15 minutes.  Turn oven down to 325 degrees and cook for 30 minutes more and check for doneness with a toothpick.  Cover with foil the last 10 minutes if crust is getting too brown (if not using crust, you likely will not need to cover it).  Cut into slices and serve.


Bon Appetit,

Saturday, July 12, 2014

Savory Sweet Potato Salad


Slap yo Momma, this is the BEST tater salad I've ever had!!!  I'm skipping ahead to my last submission for the recipe contest, since I'm still not 100% satisfied with how recipe #5 turned out.  It was a wine infused trout that I DID submit, and it was pretty good, but I think it's got some more adjustments to make to it before posting it on the blog.  I probably shouldn't of submitted it for the contest, but I wanted to get another entry in so I did anyways.  The recipe today though is for the most AH-MAZING potato salad you'll ever eat!  I actually didn't even intend on entering this one into the Away from Home cooking contest, but once I made it I realized it fit all the rules (except I did have to omit the pepper in the recipe entry because I had 11 ingredients instead of 10...hope it still turns out ok!), and it also was so amazing I knew I had to!  I made this for a "5th of July" shindig and everyone raved about it there as well (whew...it wasn't just me that thought this sucker was good!).  Then most of them asked for the recipe too (good thing I wrote it down!).  The inspiration for this dish was the fact that while I love the concept of potato salad at a cookout, I typically am not too thrilled over most.  They're usually just so BORING.  They typically all have that "deli" taste to them- the mustard base with eggs and relish and maybe celery.  It never thrills me.  And I try and eat more sweet potatoes than white potatoes because sweet potatoes pretty much have 10 times the nutrients in them (yes...I made that statistic up...).  I also hate it when a potato salad is sweet (I know..."hate" is a strong word!), therefore, there's no sugar in my recipe!  I used all mayo (no sour cream...therefore no dairy...therefore my dairy-free friends can eat it too!), added lemon juice to bring out the flavor, used 2 types of onions (red and green) to give it a crunch (I really had no desire to add celery or relish), used fresh herbs (dill and thyme), seasoned with paprika (to give it a slight kick!), salt/pepper, and then I added bacon bits!!  BACON and fresh herbs make all the difference!  

Mmm...BACON...

The usual texture changes that typical potato salads have, I achieved by using the red onion, green onion, and bacon bits...and I didn't have to add the other "generic" stuff to it that I strongly dislike! (eggs, celery, relish...etc.).  (And side note- DON'T USE MIRACLE WHIP!!  It will NOT taste the same if you do!  Not to mention that stuff's just GROSS anyways.  Don't use it people.  Ever.  Just.  Don't.)  If you want to make an easy meal to impress and knock people off their feet with yummy goodness, this is the way to go!  You should know that it will take a few hours to make since the potatoes have to cook and cool COMPLETELY before adding the dressing to them, and THEN they have to sit in the fridge for at least 1 hour to allow the flavors to meld together (the longer the better!).  So, give yourself a good 2-4 hours to prepare these.  When I add the dressing to the potatoes, I only add half of the mixture at first to make sure that the potatoes aren't swimming in the dressing.  I gently stir it (if you stir too hard you'll break apart the potatoes and make them mushy!) and then add more dressing as needed.  You may use all of it, you may not.  I only used 3/4 of the mixture.  Note: DON'T throw the leftover dressing away!  It'll make an awesome marinade for fish another night!  So, next time you decide to bring a potato salad to a get-together, try this one instead!  It's a guaranteed hit!  (And if it's not...or if it is!...leave me a comment below and let me know!) 


Savory Sweet Potato Salad
Serves: 8 
Prep and Cook Time: 2 hours (approximately)

Ingredients:
2 pounds sweet potatoes
1 TBL fresh thyme, removed from stem
1 TBL fresh dill, chopped 
1/2 TBL kosher salt
1/2 tsp paprika (plus 1/4 tsp for garnish)
1/4 tsp black pepper
Juice from 1/2 medium lemon
1 cup mayonnaise (NOT Miracle Whip!)
1/4 cup green onions (white part), thinly sliced
2 TBL green onion (green part), thinly sliced (for garnish)
1/2 medium red onion, diced
4 TBL Real Bacon Bits (from a 3 oz. package- NOT the bottled kind), OR use freshly cooked, crumbled bacon (PLUS 1/2 TBL for garnish)

Method:
1. Prepare sweet potatoes: Rinse and scrub potatoes, then use a peeler or a small knife to peel the skin off sweet potatoes.  Cut each potato in half, cut into cubes, and place in large pot.
2. Add water to pot of sweet potatoes; enough water to cover the potatoes (about 3/4 full).  Bring water to a boil.  Once boiling, boil sweet potatoes for 5-10 minutes, just until "fork tender" (tender enough to stick a fork in them with no resistance).  Drain and let cool completely (this could take 30 minutes-1 hour to fully cool).
3. While cooking and cooling sweet potatoes, chop and prepare all of the herbs and additional ingredients.  Add mayonnaise into a medium bowl along with the thyme, dill, salt, pepper, 1/2 tsp paprika, lemon juice, 1/4 cup green onion, red onion, and 4 TBL bacon bits.  Stir all ingredients together until well mixed.  If potatoes are not fully cooled yet, let mixture sit covered in the refrigerator until ready to use.
4. Once sweet potatoes have fully cooled, add them to a large bowl along with half of the mayonnaise mixture.  Gently stir with a spoon, being careful not to over-mix as this will make the sweet potatoes break up and become "mushy".  Add more of the mayonnaise mixture as needed or desired.  You will want them to be well coated with the mixture, but not drenched in it (you may only use 3/4 of the mixture).  Save any remaining mayonnaise mixture for later use (it's great as a marinade for fish!)
5.  Let the sweet potato salad chill, covered, in the refrigerator for at least 1 hour, or overnight, to allow the flavors to meld.  Once chilled, gently stir once more and garnish with the additional green onion, bacon, and paprika.


Bon Appetit,

Sunday, July 6, 2014

Sauteed Asparagus with Gruyere Cream Sauce


I know, I know.  You're thinking "what's with all the cream sauces, Megan??"  It's just so easy to make and it's SO. GOOD!  Especially when you add CHEESE to it!  Mmmm....  Trust me.  Once you make a cream sauce, you'll want to top it on everything too!!  And mixing up the types of cheese you add to it completely changes the flavor depending on what you're making!  It's like creamy, cheesy magic for your food.  Cream sauce aside, this is my 4th entry in the Away from Home cooking contest; I'm trying hard to at least get in the Top 50!  I made this for a "Celebration Dinner" for my parents to celebrate my Mom's birthday and belated Father's Day.  I asked my Dad what his favorite foods were and he mentioned asparagus as one...so I decided to try and "amp it up" from your regular asparagus...and it worked!  I actually wasn't even intending on entering this one in the contest, but my parents (and I) raved about it and loved it so much- and it fit all the rules for the contest- I figured that I may as well!  If you want a "fancy" take on asparagus, without much effort, this is it!  The Gruyere cheese in the cream sauce is the perfect pairing with the asparagus.  I know Gruyere can be pricier, but I promise it's worth it!!  I actually got my block of Gruyere at Trader Joe's, and it was cheaper than anywhere else...only about $5- not bad if you ask me!  So, if you've got a Trader Joe's in your area, I'd recommend buying it from there (and pick up a few bottles of Two Buck Chuck while your at it- amazing stuff!).  Once again, the small effort of actually shredding the cheese with a grater by hand really makes a difference!  Don't buy the bagged stuff.  Please.  I paired this dish with trout, which also made an excellent pairing.  But this would really be a great side for most any meat- steak, fish, chicken, pork...there's really no meat it wouldn't be good with (in my opinion!).  The key to making the asparagus the perfect tenderness is to parboil them (boiling for a short amount of time) and then immediately placing them in an ice bath (bowl of ice with cold water) so that it shocks them and stops the cooking process until you're ready to sauté them.  Since they've already been parboiled, you don't sauté them very long either.  Another trick- when removing the woody ends of the asparagus, just hold it at the top and the bottom and lightly bend it, wherever it naturally bends is what you want to snap off.  Easy peasy!  So, if you're an asparagus lover, give this a try and you just might fall in love with asparagus even more!  And if you're NOT an asparagus lover, try this with LOTS of the cream sauce (try it with lots of it even if you DO love asparagus)...you might discover a new love for asparagus (or at least like it a little bit more...).  Enjoy!


Sauteed Asparagus with Gruyere Cream Sauce
Yield: 2 servings
  • 1 pound fresh asparagus, rinsed and woody ends removed
  • 1/2 teaspoon garlic powder
  • 1/2 teaspoon (plus 1/4 teaspoon) kosher salt
  • 1/4 teaspoon freshly ground black pepper
  • 1 teaspoon fresh rosemary, diced
  • 1 cup heavy cream
  • 2 Tablespoons unsalted butter
  • 1 cup freshly shredded Gruyere cheese
  • 1/2 Tablespoon extra virgin olive oil
  1. Fill a medium pot half full of water and bring to a boil over medium-high heat.  Prepare and ice bath: add cold water to a medium bowl of ice (bowl should be large enough to hold asparagus once cooked), and set aside.  Add asparagus to boiling water and bring water back to a boil.  Once boiling, boil asparagus for 2 minutes, then drain, rinse with cold water, and immediately transfer to the ice bath.  Set aside.
  2. Mix cream, butter, and 1/2 teaspoon salt in small sauce pot.  Bring to a boil over medium heat, stirring frequently until sauce is thick enough to coat a spoon (approximately 4 minutes).  Remove from heat and stir in cheese until melted.
  3. While cooking cream sauce, heat oil in a sauté pan.  Drain asparagus from the ice bath and add to the hot pan.  Stir in 1/4 teaspoon salt, pepper, garlic, and rosemary.  Sauté for approximately 3 minutes.  Remove from heat and top with cream sauce.


Bon Appetit,

Monday, June 16, 2014

Rosemary Flank Steak with Bleu Cheese Cream Sauce


Y'all.  Seriously.  This has got to be one of the BEST things I've ever put in my mouth!  The tenderness of the flank steak paired with the creaminess and strength of the blue cheese cream sauce was the PERFECT combination.  I used to HATE blue cheese.  I still don't like really strong blue cheeses, but this sauce takes a lot of the usual "kick" away from just plain blue cheese, yet keeps enough of the "kick" to know you're eating bleu cheese in the sauce.  This really couldn't be any easier to cook either.  I marinated the steak for an hour, but the actual cook time was less than 20 minutes!  Uhh, talk about an amazing but quick week-night dinner!  This would be the perfect "stay in" date night meal.  Marinate the steak all day while you're at work (I only had an hour to marinate it- it won't hurt to marinate it longer!), come home and heat up the grill pan, season the steak a bit more, throw it on the grill pan (or grill) for 8 minutes (4 minutes on each side- gives you the perfect medium rare steak), let it rest for 5 minutes and cook the sauce all in one pot while the steak is cooking. That's it!  So. Easy.  I guarantee your taste-buds will NOT be disappointed.  I paired this with my loaded mashed cauliflower- steak and "potatoes" made for another perfect combination.  This was the third entry I did for the Away From Home Cooking contest, and I just hope the picture's good enough to make the judges see the amazingness this dish has to offer! (I thought the picture quality was better than it turned out to be :/ )  It's a winner in my book...I just hope it's a winner for the challenge too!  Enjoy!


Rosemary Flank Steak with Bleu Cheese Cream Sauce

Serves: 4

For the steak:

  • 1 pound flank steak
  • 2 teaspoons kosher salt
  • 2 teaspoons freshly ground black pepper
  • 4 cloves garlic, minced
  • 1 Tablespoon fresh rosemary, chopped (plus 3 sprigs, whole)
  • 1 cup extra virgin olive oil
For the sauce:
  • 4 ounce block extra creamy Danish blue cheese, crumbled by hand
  • 1 cup heavy cream
  • 2 Tablespoons butter
Method:
  1. In a Ziploc bag, add oil, 1 tsp. salt, 1 tsp. pepper, 2 cloves garlic and 3 sprigs of rosemary and mix until combined.  Add flank steak to bag, coating mixture on steak.  Marinate mixture in refrigerator for at least 1 hour (or more), turning bag over every 30 minutes-1 hour (if able- if you're marinating it while you're not home, no worries, it'll still be fine!).  
  2. Heat a grill pan (or grill) on medium heat.  Remove steak from marinade and discard remainder of marinade.  Season steak with remainder of salt, pepper, garlic, and the chopped rosemary on both sides, lightly pressing seasonings into the steak with a fork.
  3. Add steak to grill pan (or grill) and cook for 4 minutes.  Turn steak and cook another 3-4 minutes for medium rare.  Remove steak from pan and let rest on a plate or cutting board for 5 minutes.
  4. While the steak is cooking, in a small saucepan, add heavy cream and butter and bring to a boil over medium heat.  Let mixture simmer until thickened (it should coat a spoon), about 4 minutes, whisking frequently.  Once thickened, reduce heat to low and whisk in bleu cheese until melted (but it's okay if a FEW crumbles do not melt).
  5. Slice steak against the grain in thin slices and top steak with blue cheese cream sauce.  Serve remainder of sauce in a bowl on the table in case more is wanted!


Bon Appetit,